Why do we need "sharpening"? Well, you actually don't. But, given 2 identical photos, you will see that the one that is sharpened will be able to identify that it seems to be better focused and "sharp". This, a lot of times enhance the photographic viewing experience and create a more detailed perception of the picture.
Let's look at an example:
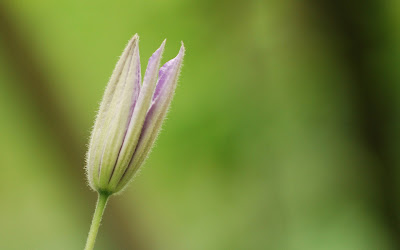
Original photo (cropped)
Here is the same image after sharpening (and color correction)
 Pay attention to the pointy tip of the flower and the creases - and you can see a lot more if you view large (by clicking on the images).
The sharpening technique I used is called "edge sharpening". There are a lot of variety and settings that people use for this kind of sharpening (click here for Google search result for "edge sharpening"). There are other types of sharpening, lab-sharpening or just plainly using the unsharp mask. I am not going to discuss those methods in this post, but only going to focus on edge-sharpening.
Here is the step-by-step process that I usually take (you can make this into an action if you want) - I am using Photoshop CS and I am assuming that it will be similar in the newer versions:
- Open you image, crop, adjust levels, curve, etc etc.
- Create a new channel: Go to channel palette, click the new channel icon on the bottom. Put a name on your channel, call it "Sharp Channel" (or whatever you want). In PS CS, it will create a new channel and focus on this new channel (black screen/image). Still on the channel palette, click on the RGB channel to focus back on your image.
- Select the whole image (Ctrl-A or do SELECT - ALL), and then copy the whole image (EDIT - COPY or EDIT - COPY MERGE)
- Paste it on the new channel "Sharp Channel": select the "Sharp Channel" and then paste (EDIT - PASTE). It will display as black and white, which is OK.
- Find edges: Make sure the "Sharp Channel" is focused/selected, and then click FILTER - STYLIZE - FIND EDGES
- Eventually we are going to make this as a mask. So that means that the black part will affect your image and the white area won't. If you are pretty satisfied with the mask (it is hard to say what is a "good" one at this point - you will just have to experiment), you can skip step 7 and go to step 9 directly. I usually (9 out of 10) always do step 7 & 8 ...
- Click IMAGE - ADJUSTMENTS - LEVELS. Try to adjust the levels by moving the triangular slide below the histogram. You basically want to make black to be very black and white to be white. Keep in mind that once we convert this channel into a mask, the black area are the one that will be sharpened. Play with this (unfortunately with trial and error) until you get the desired effect.
- If there are details, lots of lines, etc, you may want to introduce a nice smoot transition from the sharpened area to the non-sharpened area. Use Gaussian Blur to do this: FILTER - BLUR - GAUSSIAN BLUR (enter between 1-5 px).
- Now click SELECT - LOAD SELECTION. A dialog box will show up and make sure the selected channel is correct and "INVERT" checkbox is checked. Hit OK.
- Click "Layers" (you were on "Channels"). The mask from our edge will be super-imposed on our image. You can hide this "blinking selection" by doing this: click VIEW - SHOW - and uncheck SHOW SELECTION.
- Now we are ready for sharpening. It is usually helpful to view the image in large view/zoomed in. I would go for 100% zoom/view before start sharpening - so I can see/preview the affect of the sharpening. Click FILTER - SHARPEN - UNSHARP MASK. Try out combination of values in the USM window until you get the desired result. I recommend to keep the threshold to 0 and the radius to be less than 1.5.
There you go - good luck!

 Pay attention to the pointy tip of the flower and the creases - and you can see a lot more if you view large (by clicking on the images).

1 comment:
Cool Cool. I'll give it a try.
Post a Comment